Hoverboards have become increasingly popular in recent years. Though they are not without their controversy, many people enjoy riding them. You’ll get here on How to Change Hoverboard With a Laptop Changer with details. If you have a hoverboard and want to change the way it looks, you can do so with a laptop charger.
This is a relatively simple process that only takes a few minutes to complete.
- Locate the charging port on your hoverboard
- This is usually located on the side of the board near the bottom
- Plug one end of your laptop charger into the charging port
- Plug the other end of your laptop charger into a power outlet or your computer’s USB port
- Allow the hoverboard to charge for several hours until it is fully charged
How to Change Hoverboard With a Laptop Changer?
It is not recommended to change a hoverboard with a laptop charger, as the two devices have different power requirements and using an incorrect charger can cause damage to the hoverboard’s battery or electronics.
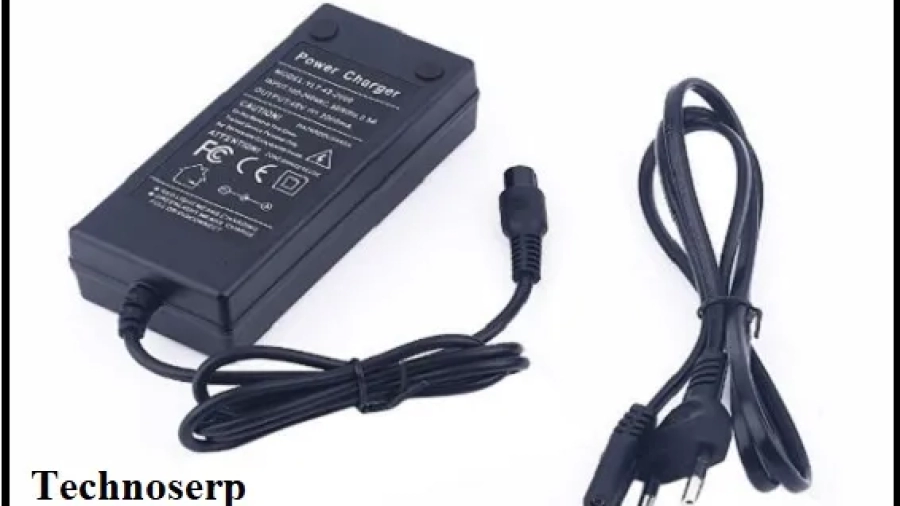
If you need to charge your hoverboard, it’s important to use the charger that came with it or a compatible replacement charger that meets the manufacturer’s specifications. Typically, hoverboard chargers have an output of 42 volts and a charging time of around 2-3 hours.
To charge your hoverboard safely, follow these steps:
- Ensure that the hoverboard is turned off and unplugged.
- Connect the charger to the hoverboard’s charging port.
- Plug the charger into a wall outlet.
- The charging indicator on the hoverboard should light up and indicate that it is charging.
- Allow the hoverboard to charge fully before unplugging the charger.
Can I Use a Different Charger for My Hoverboard?
If you have a hoverboard, chances are you’re wondering if you can use a different charger for it. The answer is yes and no. Yes, you can use a different charger for your hoverboard, but it must be compatible with the make and model of your hoverboard.
Otherwise, you could damage your hoverboard or even cause a fire.
So, how do you know if a charger is compatible with your hoverboard? The best way to find out is to check the manufacturer’s website or ask customer service.
They will be able to tell you which chargers are safe to use with your specific hoverboard model.
In general, however, most UL2272 certifiedhoverboards will come with a standard micro-USB charging port. This means that any micro-USB charger should work just fine – as long as it produces the correct voltage (usually 36V).
Just be sure to double check before plugging anything in!
How Do You Charge the Hover 1 Hoverboard Without a Charger?
If you’re like most people, you probably think that hoverboards are powered by magic. But the truth is, they’re actually powered by lithium-ion batteries. And like all lithium-ion batteries, hoverboards need to be charged regularly in order to keep them working properly.
But what do you do if you don’t have a charger for your hoverboard? Well, there are a few things you can try. One option is to use a standard household AC outlet.
Just plug the charger into the outlet and then into your hoverboard. Be sure to use the proper adapter though – not all outlets are created equal! Another option is to use a car charger.
This will work as long as your car’s battery is strong enough to handle the charge. Just plug the charger into your cigarette lighter socket and then into your hoverboard. Again, be sure to use the proper adapter!
Finally, if all else fails, you can always take your hoverboard to a local electronics store or repair shop and have them charge it for you. Most of these places will have the right equipment and expertise to get the job done quickly and safely.
Can You Change the Charging Port on a Hoverboard?
There are a few things to consider before changing the charging port on your hoverboard. The first is whether or not you have the right tools. You’ll need a soldering iron, solder, and heat shrink tubing.
If you don’t have these tools, it’s best to take your hoverboard to a professional who does. The second thing to consider is the type of charger you’re using. Some chargers are not compatible with certain types of ports, so you’ll need to make sure that the charger you’re using will work with the new port you’re installing.
Finally, you’ll need to be very careful when soldering and heat shrinking the new port onto your hoverboard. One wrong move could damage your board beyond repair.
If you have the right tools and experience, changing the charging port on your hoverboard is fairly simple.
First, remove the old port by carefully de-soldering it from the board. Next, solder the new port in its place and then heat shrink any exposed wires. Be sure to test your new setup before riding your hoverboard!
How Do I Get My Hoverboard to Charge?
Hoverboards are one of the hottest new items on the market, but they can be a little tricky to use. One of the most common questions we get is “How do I get my hoverboard to charge?” Here are a few tips to help you out:
1. Check the power cord – Make sure that the power cord is plugged into both the hoverboard and the wall outlet. If it’s not, then your hoverboard won’t charge.
2. Check the batteries – Most hoverboards have two batteries (one for each wheel).
Each battery should be properly seated in its compartment and secured with the retaining screws. If one or both batteries are loose, then your board won’t charge.
3. Use the right charger – Some people try to use cell phone chargers or other types of generic USB chargers, but this usually doesn’t work well.
Hoverboards require a specific type of charger that’s designed to work with their battery packs. Using an incompatible charger can damage your board and void your warranty.
4. Follow the charging instructions – Every hoverboard is different, so make sure to read your particular model’s instructions carefully before plugging it in to charge.
Generally speaking, you’ll want to let it charge for 4-6 hours before using it for extended periods of time (like riding around all day).
If you follow these tips and still can’t get your board to charge, then please contact us and we’ll be happy to help out!
If you are interested to purchase a Laptop then you may check the Best Budget Gaming Laptops Under 1000, Best 2 in 1 Laptops under 1000, Best 2 in 1 Laptops under 600, and the Best 2 in 1 Laptops under 200.
How to Charge a Hoverboard Without a Charger
Are you the proud owner of a hoverboard? If so, then you know that one of the most important parts of owning a hoverboard is keeping it charged. Without a charger, your hoverboard will be rendered useless.
Thankfully, charging a hoverboard without a charger is not as difficult as it may seem. With a little bit of creativity and resourcefulness, you can get your hoverboard up and running in no time! The first step to charging your hoverboard without a charger is to find an alternative power source.
The best way to do this is to find another device that uses the same type of battery as your hoverboard. Once you have found an compatible power source, simply attach the positive and negative wires from the power source to the corresponding ports on your hoverboard. If you are having trouble finding an alternative power source, there are other options available to you.
You can purchase a replacement battery for your hoverboard or look into purchasing a universal charger that will work with any type of battery. With either of these options, simply follow the instructions provided with the product in order to charge your hoverboard successfully. With a little bit of effort, you can easily charge your hoverboard without a charger!
Can You Charge a Hoverboard With a Laptop Charger
If you’re like most people, you probably think that charging a hoverboard with a laptop charger is out of the question. After all, hoverboards require special chargers to work, right? Well, it turns out that you can charge a hoverboard with a laptop charger – and it’s not as complicated as you might think.
Here’s what you need to know about using a laptop charger to power your hoverboard. Most laptop chargers are designed to output around 19V of power – which is more than enough to charge a hoverboard. Many hoverboards come with adapters that allow you to plug them into a standard outlet.
So, if your laptop charger has the right kind of adapter (or if you have an adapter that will fit your particular model of charger), then you should be able to charge your hoverboard without any problems. Of course, there are a few things that you’ll need to keep in mind when using a laptop charger to power your hoverboard. First of all, make sure that the voltage output on your charger is set to 19V.
If it’s not, then you could damage your hoverboard or even cause it to catch fire. Secondly, only use chargers that have been specifically designed for use with hoverboards – don’t try to use any old generic charger that you might have lying around. And finally, make sure that the connector on your charger is compatible with the port on your hoverboard.
Different models of hoverboards use different types of connectors, so it’s important to get this right or else you won’t be able to charge up your board! So there you have it – everything you need to know about using a laptop charger to power your hoverboard.
How to Charge Hoverboard
If you’re the proud owner of a hoverboard, congratulations! These self-balancing scooters are a blast to ride. But like any battery-powered device, they will eventually need to be recharged. We have to know also on how to remove the internal battery from Acer Laptop.
Here’s a step-by-step guide on how to charge your hoverboard: 1. Locate the charging port. This is usually located on the underside of the hoverboard near one of the wheels.
2. Plug in the charger. Most hoverboards come with a standard AC adapter that can be plugged into any outlet. 3. Allow the hoverboard to charge for 2-3 hours.
Depending on the size of the battery, it may take longer or shorter to fully charge. 4. Once the indicator light turns green or off, your hoverboard is fully charged and ready to ride!
Conclusion
If you want to change your hoverboard with a laptop charger, there are a few things you need to keep in mind. First, make sure that the charger you have is compatible with the hoverboard. Second, check the voltage and amperage of the charger to ensure it is compatible with the hoverboard.
Finally, follow the instructions provided by the manufacturer to safely change your hoverboard.