Making a Mickey Mouse photo booth frame is easy and only requires a few materials that can be found around the house. How to Make a Mickey Mouse Photo Booth Frame? the answer, in brief, is given here. The most important part is to make sure the frame is big enough to fit all your guests in the picture. Once you have your frame, you can decorate it however you like.
Get creative and have fun with it!
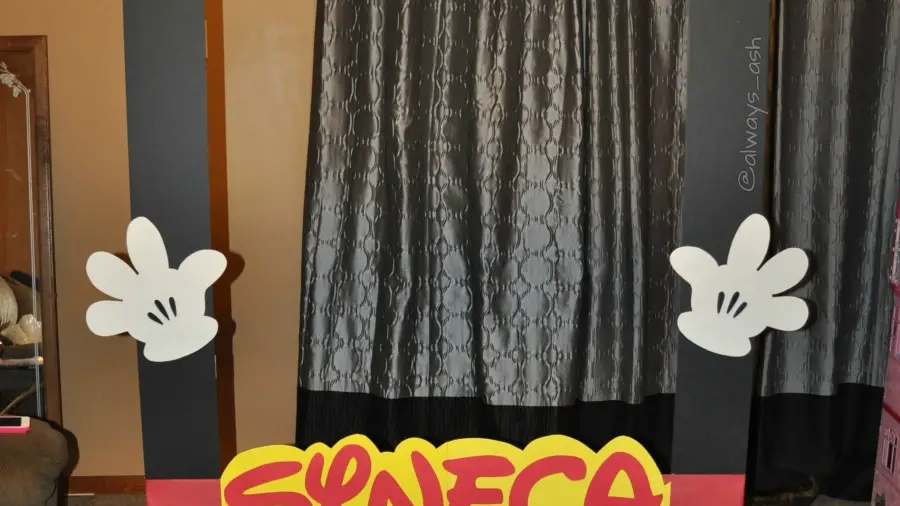
Mickey Mouse Photo Booth Frame|DIY Minnie Mouse photo frame prop, |Kids Party Decor Ideas-JM Craft
- Obtain a large piece of cardboard or poster board
- Cut out two oval shapes from the cardboard, slightly larger than the size of your head
- Paint the ovals black and allow them to dry
- Once dry, glue or tape them together at the edges to form a frame
- Decorate the frame with Mickey Mouse-themed stickers, paint, glitter, etc
- Be creative! 4
- Hang the frame on a wall or door using tape or push pins
- Stand in front of the frame and have someone take your picture!
Minnie Mouse Photo Booth Frame
Minnie Mouse is one of the most popular characters at Disney Parks. She’s also a popular party theme for kids birthday parties. So, it’s no surprise that Minnie Mouse photo booth frames are a big hit!
These fun frames are perfect for party guests to take photos in front of. They’re also great for displaying photos from the party afterwards.
Minnie Mouse photo booth frames come in a variety of styles and designs.
There are simple ones that just have her iconic ears, and others that are more elaborate with her whole head and bow. No matter which style you choose, they’re all sure to be a hit with your guests!
Mickey Mouse Photo Booth Backdrop
Do you want to add some extra fun and excitement to your next party? Then why not set up a Mickey Mouse Photo Booth Backdrop! It’s easy to do and will be a big hit with all your guests, young and old.
Here’s what you’ll need:
-A roll of black construction paper or a black tablecloth
-A roll of white construction paper or a white tablecloth
-Scissors
-Tape or stapler
-A printer (optional)
-Mickey Mouse ears template (download here)
-Photo booth props (download here)
First, cut out two large circles from the black construction paper or tablecloth.
These will be the ears. Next, cut out a smaller circle from the white construction paper or tablecloth. This will be the face.
If you have a printer, you can print out a copy of Mickey Mouse’s face onto the white circle. Otherwise, just draw on his features with marker or paint. Once the face is complete, tape or staple it to one of the black ear pieces.
Repeat for the other ear.
now you have your very own DIY Mickey Mouse photo booth backdrop! Hang it up on a wall using tape or push pins, or drape it over a doorframe or window. Set up your props in front of it and let the fun begin!
Mickey Mouse Photo Frame Online
If you are a big fan of Mickey Mouse, then you would love to have a Mickey Mouse photo frame. There are many online stores that sell Mickey Mouse photo frames and other related products. The best thing about shopping online is that you can find great deals and discounts.
You can also find a wide variety of products to choose from. When shopping for a Mickey Mouse photo frame, it is important to consider the size of the frame and the type of material that it is made from. There are many different sizes and materials available, so you should be able to find one that fits your needs perfectly.
You can also find frames that come with different border designs and colors. If you want something unique, then you might want to consider getting a custom-made frame. There are many online stores that offer this service. Do you know How to Connect a Mouse to a Chromebook? don’t be sad you’ll get here details about it.
All you need to do is provide them with a picture of Mickey Mouse and they will create a one-of-a-kind frame for you. This is a great way to make sure that your frame is truly unique and will stand out from the rest.
Mickey Mouse Photo Booth Template
If you’re planning a Mickey Mouse-themed party, this free printable photo booth template is the perfect addition! Just download, print, and cut out the pieces to create a fun props for your guests. Included in the template are ears, gloves, and bow ties – all in black and white so they’ll show up well in photos.
Mickey Mouse Photo Booth Diy
Mickey Mouse is one of the most popular and iconic characters in the world. He has been a part of pop culture for over 90 years and his image is instantly recognizable. If you’re looking for a fun and unique photo booth idea, why not try a Mickey Mouse themed photo booth?
A Mickey Mouse photo booth is relatively easy to DIY. All you need are some black and white striped fabric, red felt, and some gold or silver glitter paper. You can use these materials to create a backdrop, props, and even a costume for your guests to wear.
For the backdrop, simply hang the black and white striped fabric on a wall or door. Then cut out circles from the red felt and glue them onto the fabric in random spots. Finally, add some sparkle by cutting out stars or other shapes from glitter paper and attaching them to the fabric with double-sided tape.
As for props, you can create all sorts of things using felt, cardboard, and pipe cleaners. Some ideas include: Mickey Mouse ears, bow ties, mustaches, top hats, glasses, etc. Get creative and have fun.
Finally, if you want to take things up a notch, you can make costumes for your guests to wear while they’re in the photo booth. For example: Guests could dress up as Minnie Mouse (complete with skirt), Donald Duck (yellow shirt + blue sailor hat), Goofy (tall green hat + big shoes), or even Pluto! Just make sure everyone knows what character they’re supposed to be so there’s no confusion when it comes time to take photos.
If you follow these steps, you’ll be well on your way to creating an unforgettable Mickey Mouse themed photo booth that your guests will love!

Credit: www.youtube.com
What Do You Need on How to Make a Mickey Mouse Photo Booth Frame
If you’re looking to add a touch of Disney magic to your next party or event, consider creating a Mickey Mouse photo booth frame! With just a few supplies and a little bit of creativity, you can easily create a fun and festive backdrop that will have everyone smiling for the camera. Here’s what you’ll need:
-A large piece of cardboard or foam board
-Black marker or paint
-Yellow construction paper
-Scissors
-Glue or tape
-A printer (optional)
Begin by cutting out two large ears from the black cardboard or foam board. You can freehand this step, or use a template if you prefer. Next, cut out two smaller circles from the yellow construction paper – these will be used for the centers of the Mickey Mouse ears.
Glue or tape them in place on the black ears.
Now it’s time to decorate! Use the black marker or paint to add Mickey’s signature face onto the center of the frame.
If you’re feeling extra creative, you can also add additional details like stars, swirls, balloons, etc. Once your design is complete, set up your photo booth frame and get ready for some fun memories!
How Do You Put the Frame Together
In order to put the frame together, you will need to have the following materials: four corner posts, two side rails, one cross rail, and sixteen screws.
Start by attaching the side rails to the corner posts using screws. Make sure that the side rails are flush with the top of the corner posts.
Next, attach the cross rail to the side rails in the middle using screws.
Your frame is now complete!
How Do You Decorate the Frame
There are a few different ways that you can decorate the frame of your door. You can use paint, wallpaper, or even fabric to create a unique and stylish look for your home. If you want to use paint, you will need to first decide on the color that you want.
You can either choose a color that matches the rest of your home’s decor, or you can go for something completely different. Once you have decided on the color, you will need to purchase some primer and paint brushes. Be sure to follow the instructions on the primer carefully before painting the frame.
There are also related reviews content which you may like to choose the 10 Best Mouse For IMac, Best Mouse For Auto CAD, and the Best Mouse For Programming.
Once the primer is dry, you can start painting the frame with your chosen color. If you want to add some extra pizzazz to your door, consider using stencils or stamps to create patterns on the frame. Wallpaper is another great option for decorating your doorframe.
There are many different colors and patterns available, so you should be able to find something that coordinates well with your home’s existing décor. When applying wallpaper to the frame, be sure to use a adhesive that is specifically made for wallpaper. This will ensure that it stays in place and looks its best.
If you prefer something a little more traditional, then fabric might be a good option for you. Fabric can be wrapped around the entire frame or just attached in certain areas. It all depends on what look you are going for.
Just like with wallpaper, be sure to use an adhesive that is made specifically for fabric so that it doesn’t fall off over time. These are just a few ideas for how you can decorate the frame of your door. With a little creativity and effort, you can transform this often overlooked area into something truly special!
Conclusion
Making a Mickey Mouse photo booth frame is easier than you might think! All you need is some black cardstock, scissors, and a hot glue gun. First, cut out two large oval shapes from the black cardstock.
These will be the ears of your Mickey Mouse photo booth frame. Next, use the hot glue gun to attach the two oval shapes to the top corners of your frame. Once the ears are in place, you can decorate your frame however you like!
Use markers or stickers to add eyes, a nose, and a mouth on How to Make a Mickey Mouse Photo Booth Frame. Now all that’s left to do is take some fun photos with your friends using your new DIY photo booth frame!