Your camera flash may not be working due to issues with the flash settings or a malfunctioning flash unit. Do you know Why Isn’t My Flash Working on Camera? To troubleshoot the problem, check the flash settings on your camera and ensure that it is set to activate when needed.
If the settings are correct and the flash still doesn’t work, there may be a problem with the flash unit itself, requiring professional assistance.
Why Isn’t My Flash Working on Camera? Step-by-step guide
Here’s a concise guide to troubleshooting why your camera flash might not be working:
- Check for Physical Obstructions:
- Ensure there are no cases, accessories, or film covering the camera or flash.
- Remove any magnetic objects near the camera, as they can interfere with the flash.
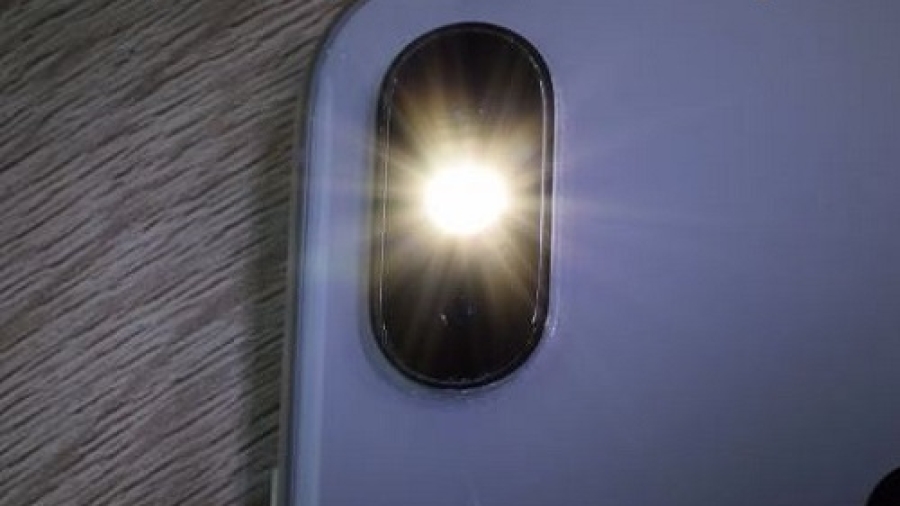
- Test the Flashlight:
- On your iPhone or iPad, access Control Center (swipe down from the upper-right corner or up from the bottom edge).
- Tap the flashlight icon to verify if the LED flash works. If it does, proceed to the next step.
- Camera App Settings:
- Open the Camera app and review the flash settings.
- Tap the flash button to select a different mode (auto, on, or off).
- Test different settings to see if the flash consistently functions.
- Software and Firmware Updates:
- Outdated software or firmware can cause flash issues.
- Update your device to the latest iOS version or firmware.
- Clean the Camera Lenses:
- Blurry photos may result from dirty lenses.
- Use a microfiber cloth to clean both front and back camera lenses.
- Inspect for dirt or debris; contact Apple Support if needed.
- Restart Your Device:
- A simple reboot can resolve flash-related problems.
- Power off your device, wait a few seconds and turn it back on.
- Check Both Cameras:
- If your device has front and rear cameras, test both.
- Switch between cameras using the rotate button in the Camera app.
If the steps mentioned above do not resolve the issue, consider reaching out to Apple Support for additional assistance. They can provide further troubleshooting guidance or recommend service options.
Full tips on Why My Camera’s Flash isn’t working
Common Causes
Battery Issues
One of the common reasons why your camera flash isn’t working could be due to battery issues. Check if the battery is properly inserted and has enough power. Low battery levels can hinder the flash from functioning properly. It’s essential to use high-quality batteries to ensure optimal performance of your camera’s flash.
Hardware Malfunction
If your flash still isn’t working, a hardware malfunction could be the culprit. Inspect the flash bulb for any signs of damage or wear and tear. A faulty flash component can prevent the flash from firing, requiring professional repair or replacement. Ensure the flash is securely attached to the camera and that there are no loose connections.
Settings Misconfiguration
Another potential cause of flash malfunction is a misconfiguration of settings. Verify that the flash settings on your camera are correctly adjusted for the shooting conditions. Review the camera’s user manual to ensure proper configuration. Check if the flash is enabled and the correct mode is selected. Incorrect settings can lead to inoperative flash functionality.
Troubleshooting Steps
Encountering issues with your camera flash can be frustrating, especially when you need it for capturing important moments. However, before rushing to the nearest camera service center, you can try some troubleshooting steps to identify and fix the problem yourself. Here are three simple steps you can take to get your flash working again:
Check Battery Level
If your camera flash isn’t working, the first thing you should do is to check the battery level. An insufficient battery charge can cause the flash to malfunction or not work at all. Follow these steps to check the battery level:
- Turn off your camera.
- Locate the battery compartment on your camera.
- Open the battery compartment and remove the batteries.
- Check the battery contacts for any signs of corrosion or dirt.
- If necessary, clean the battery contacts using a soft cloth or cotton swab dipped in rubbing alcohol.
- Insert fresh or fully charged batteries into the compartment.
- Close the battery compartment securely.
- Turn on your camera and test the flash.
Inspect Flash Hardware
Another reason why your camera flash may not be working could be due to a hardware issue. To rule out any problems with the flash hardware, follow these steps:
- Ensure that the flash unit is securely attached to your camera.
- Check if there are any visible cracks or damages on the flash unit.
- Inspect the flash bulb for any signs of damage, such as a broken filament or dislodged parts.
- If you find any issues with the flash hardware, contact a professional camera technician for further assistance.
Reset Flash Settings
If the above steps didn’t resolve the issue, it’s possible that the flash settings on your camera have been accidentally changed. To reset the flash settings, follow these steps:
- Access the camera menu or settings.
- Navigate to the flash settings.
- Select the option to reset or restore default flash settings.
- Confirm the reset action.
- Test the flash to see if it’s working properly.
Flash Error Messages
Flash error messages can be frustrating when you’re trying to capture the perfect moment with your camera. These error messages can provide valuable insight into what’s causing your flash to malfunction. Whether it’s an error code or a connection issue, understanding these messages can help you troubleshoot and resolve the issue quickly.
Error Code Xyz
One of the flash error messages you might encounter on your camera is Error Code XYZ. This code indicates a specific problem with your flash unit. While the exact cause can vary, it’s important to refer to your camera’s user manual or the manufacturer’s website for more information on interpreting this error code.
Flash Connection Error
A Flash Connection Error message can pop up when there’s an issue with the communication between your camera and the flash unit.
This error usually occurs when the flash isn’t securely attached or properly mounted on your camera. To fix this, make sure the flash is securely attached to the hot shoe mount or the designated connection point on your camera. Check that all the electrical contacts are clean and free from debris, as dirty contacts can interfere with the flash’s connection to the camera.
Flash Charging Error
One of the most common flash error messages is the Flash Charging Error. This message typically appears when the flash fails to charge or reach the required power level for proper operation. There are a few potential causes for this error, including a low battery, a damaged battery, or an issue with the charging circuitry.
Start by checking if your camera’s battery is fully charged or replace it with a new one. If the issue persists, it may be necessary to seek professional repair or contact the camera manufacturer for further assistance.
Tips For Preventing Flash Issues
Having trouble with your camera flash not working properly? flash issues can be frustrating and often disrupt your photography plans. Here are some helpful tips to prevent flash malfunctions and keep your camera performing at its best:
Keep Battery Charged
Regularly charge your camera battery to ensure that there is enough power for the flash to function properly. When the battery is running low, the flash may not work at its full capacity, resulting in underexposed photos.
Handle Flash Carefully
Handle the flash of your camera with care to avoid any physical damage that could prevent it from working correctly. Keep the flash clean and protect it from dust and moisture to ensure optimal performance. Rough handling can lead to internal damage that may cause the flash to malfunction.
Regularly Update Firmware
Keeping the firmware of your camera up to date is essential for preventing flash issues. Manufacturers often release firmware updates that include bug fixes and improvements, which can address flash-related issues. Check for firmware updates regularly and install them to ensure your camera is running the latest software.
Alternative Lighting Tools
When it comes to capturing high-quality photographs, proper lighting is essential. However, if your flash isn’t working on your camera, you may find yourself in a difficult situation. But fret not! There are alternative lighting tools that can help you achieve the perfect shot. In this article, we will explore three handy tools that can come to your rescue when your camera flash fails you.
External Flash
If your built-in flash isn’t functioning as it should, an external flash can be your savior. An external flash is a portable device that attaches to your camera’s hot shoe, providing additional light and versatility.
Not only does it offer a stronger and more directional source of light, but it also allows for greater control over the lighting conditions. Whether you’re shooting in low-light environments or need to eliminate harsh shadows, an external flash can greatly enhance your photography.
Led Light Panels
LED light panels are another excellent alternative lighting tool to consider. These panels consist of multiple LED bulbs that emit a constant light source, making them ideal for both photography and videography.
LED light panels are adjustable in terms of brightness and color temperature, allowing you to customize the lighting according to your needs. Whether you’re capturing portraits, product shots, or even videos, these panels provide consistent and flattering lighting.
Reflectors
Reflectors are a simple yet effective tool for manipulating light. These handy accessories come in various shapes and sizes, usually made of reflective fabric stretched over a collapsible frame.
You can bounce natural or artificial light onto your subject, softening shadows and enhancing details. Reflectors are a versatile tool that can be used both indoors and outdoors, making them a must-have addition to any photographer’s toolkit.
Read also more related topics: Why Does My iPhone 14 Camera Keep Blinking?
Why My iPhone Camera is Shaking?
How to Find an IP Camera Address?
Who Can See My Camera Roll on Snapchat?
Frequently Asked Questions For Why Isn’t My Flash Working On Camera
Why Isn’t My Flash Working On Camera?
The flash may not be working due to low battery, incorrect settings, or a faulty connection. Try troubleshooting steps like checking the battery level and adjusting flash settings.
How Do I Fix My Camera’s Flash Not Working?
To fix a camera’s flash not working, try solutions like charging or replacing the battery, checking the flash settings, cleaning the flash contacts, and updating the camera’s firmware.
Can A Low Battery Cause The Flash To Stop Working?
Yes, a low battery can cause the flash to stop working as it may not have enough power to charge the flash capacitor and trigger the flash unit. Ensure your battery is fully charged or replace it.
What Should I Do If My Camera Flash Isn’t Synchronizing?
If your camera flash isn’t synchronizing, check that the flash is compatible with your camera, ensure the flash and camera settings are properly configured, and try using a different sync method or cable.
Why Is The Flash Not Going Off When I Take A Photo?
The flash may not go off when taking a photo if the flash setting is turned off, the camera is in a mode that doesn’t require flash, or the flash unit is faulty. Check settings and consider professional repair if necessary.
How Can I Test If My Camera Flash Is Working?
To test if your camera flash is working, follow these steps: 1. Ensure the camera is on and not in silent mode. 2. Check flash settings and ensure it’s turned on. 3. Take a test photo in a dark environment and check if the flash fires.
Conclusion
Troubleshooting flash issues on your camera requires patience and careful examination of potential causes. From checking settings to inspecting hardware, understanding the common reasons behind malfunctioning flashes is crucial for effective problem-solving. By making use of the tips and suggestions provided you’ll be better equipped to tackle issues with your camera’s flash.