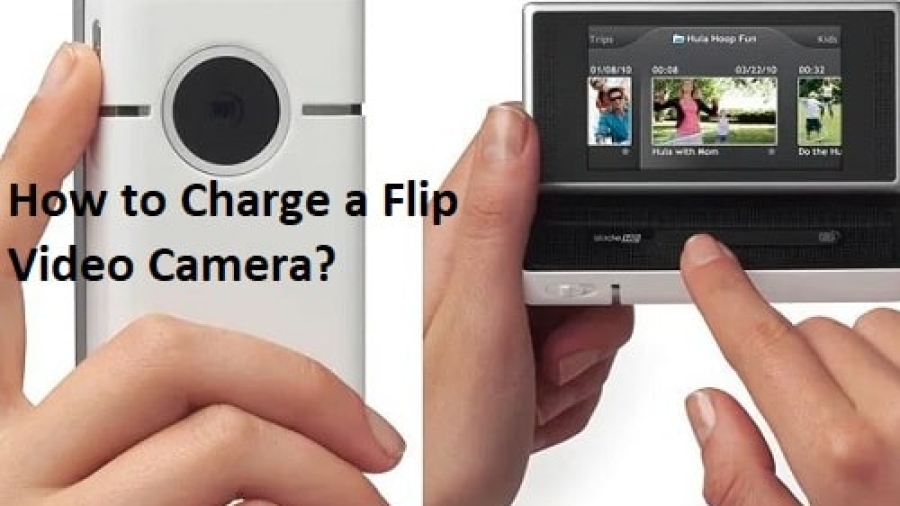
How to Charge a Flip Video Camera? To charge a Flip Video Camera, connect the camera to a power source using the included USB cable. Use a USB wall adapter or a computer to provide power for charging.
When it comes to charging a Flip Video Camera, it’s essential to have a reliable power source. By connecting the camera to a power supply using the USB cable, you can easily charge it. Whether you use a USB wall adapter or connect to a computer, providing power will ensure that your camera is ready to capture moments.
Mastering the art of charging your camera will help you make the most out of this versatile device.
How to Charge a Flip Video Camera?
In this guide, we will explore the step-by-step process of efficiently charging your Flip Video Camera, allowing you to enjoy uninterrupted recording and smooth operation. d
1. Check The Battery Level
When using a Flip video camera, it’s essential to ensure that the battery is at an optimal level to capture special moments without interruption. Here’s how to check the battery level before charging your Flip video camera.
Before charging your Flip video camera, it’s important to check the battery level to determine if it needs recharging. This ensures that you won’t miss capturing any precious moments due to a drained battery.
Power On The Flip Video Camera
To check the battery level, power on your Flip video camera by pressing the power button. Once the camera is turned on, you’ll be able to access the battery level indicator.
Locate The Battery Indicator
Find the battery indicator on the Flip video camera. This can typically be found on the display screen or as a small icon on the device itself. The indicator will display the remaining battery percentage or a visual representation of the battery level.
2. Connect The Charger
Once you have your Flip Video Camera and charger ready, it’s time to connect them. Follow the simple steps below to ensure a smooth charging process:
Identify The Correct Charger
Before connecting the charger, it’s essential to identify the correct one that came with your Flip Video Camera. The charger will have a specific shape and size that is specifically designed for your camera model. Make sure you have the correct charger in hand to avoid any damage or compatibility issues.
Plug The Charger Into An Outlet
To start charging your Flip Video Camera, find a nearby electrical outlet and plug the charger into it. Ensure the outlet is functioning by checking if other devices can be powered on using the same outlet. This step will provide a reliable power source for your camera’s recharging process.
Connect The Charger To The Flip Video Camera
Now that the charger is connected to the outlet, it’s time to connect it to your Flip Video Camera. Locate the charging port on your camera, usually located on the side or bottom, depending on the model. Take the charging cable from the charger and carefully insert it into the charging port of your camera. Make sure it is securely plugged in to ensure a proper connection.
To avoid any accidental disconnection that might interrupt the charging process, place your camera on a stable surface or keep it safely in your hand while connected to the charger.
3. Monitor The Charging Progress
Once you have connected your flip video camera to a power source and started the charging process, it is important to monitor the charging progress to ensure that your camera is properly charging. By keeping an eye on a few key indicators, you can ensure that your camera’s battery is charging effectively and will be ready for use when you need it.
Observe The Battery Indicator
The first thing to check when monitoring the charging progress is the battery indicator on your flip video camera. This indicator provides a visual representation of the battery’s current charge level and can help you determine how much longer the charging process will take.
To access the battery indicator, simply look for it on your camera’s screen or in the camera’s menu settings. The battery indicator typically appears as a small symbol or icon that resembles a battery, with bars or a percentage to indicate the charge level. As your camera charges, you should see the battery indicator increase gradually.
If the battery indicator does not increase or shows no signs of charging, there may be an issue with your camera’s charging cable or power source. In this case, it is important to check for any loose connections or try using a different charging cable or power outlet to troubleshoot the issue.
Check The Charging Time
In addition to observing the battery indicator, it is also important to keep track of the charging time to ensure that your flip video camera is charging at a normal rate. Charging times can vary depending on the camera model and battery capacity, so it is helpful to refer to your camera’s user manual for specific charging time recommendations.
If your camera is taking longer than usual to charge or is not reaching a full charge within the expected time frame, it could indicate a problem with the battery or charging system. In such cases, it may be necessary to contact the camera manufacturer for further assistance or consider replacing the battery.
By carefully monitoring the battery indicator and charging time, you can ensure that your flip video camera is charging effectively and avoid any surprises when you use it. Remember to always follow the manufacturer’s instructions for charging your camera and seek professional help if you encounter any issues.
4. Safely Disconnect The Charger
4. Safely Disconnect the Charger
Unplug The Charger From The Outlet
When you have finished charging your Flip Video Camera, it’s important to safely disconnect the charger. Begin by unplugging the charger from the outlet. This ensures that there is no power supply to the charger, minimizing any risk of electric shock or damage.
Disconnect The Charger From The Flip Video Camera
Once the charger is unplugged from the outlet, the next step is to disconnect the charger from the Flip Video Camera. Carefully remove the charging cable from the camera, ensuring not to tug or pull forcefully to avoid damaging the cable or the camera’s charging port.
5. Check The Fully Charged Status
Before you start capturing those precious memories with your Flip Video Camera, it’s important to make sure that the battery is fully charged and ready to go. Checking the fully charged status of your camera is a simple process that can help prevent any unexpected interruptions during recording. Here are a few steps to follow:
5.1. Power On The Flip Video Camera
To check the fully charged status of your Flip Video Camera, the first thing you need to do is to power it on. Locate the power button, which is usually located on the side or at the top of the camera. Press and hold the power button until the camera turns on. Once the camera is powered on, you can proceed to the next step.
5.2. Inspect The Battery Indicator
Now that your Flip Video Camera is on, it’s time to inspect the battery indicator to check if the battery is fully charged. The battery indicator is usually displayed on the camera’s LCD screen or top of the camera near the power button. It typically consists of a battery icon that shows the remaining battery level.
Look for a filled battery icon or a battery icon that indicates 100% charge. This indicates that the battery is fully charged and ready to use. If the battery icon is not filled or shows a lower percentage, it means that the battery is not fully charged yet and you should wait a bit longer before using the camera.
It’s important to note that the time it takes for the battery to fully charge may vary depending on the model of your Flip Video Camera and the charger you are using. However, on average, it may take around 2 to 4 hours for the battery to reach a full charge.
By following these simple steps to check the fully charged status of your Flip Video Camera, you can ensure that you have enough battery life to capture all your special moments without any interruptions.
Troubleshooting Charging Issues
Having trouble charging your Flip Video camera? Don’t worry! In this section, we’ll explore some common charging issues and provide you with simple solutions.
Ensure Proper Connections
Before we move on to anything else, let’s make sure all the connections are secure. Follow these steps:
- Check the USB cable for any damage or loose connections. Ensure that it is securely plugged into both the camera and the power source.
- Inspect the camera’s power port for dust or debris. Use a small brush or a can of compressed air to clean it gently.
- If you are using a USB hub or extension, try connecting the camera directly to the computer or power outlet instead. Sometimes, these intermediate devices can cause charging issues.
By ensuring proper connections, you can eliminate any simple problems that may be hindering the charging process.
Try An Alternative Charger Or Outlet
If your Flip Video camera is still not charging, it’s time to explore other possibilities:
- Try using a different charger or cable. Sometimes the cable or charger itself might be faulty. Borrow a friend’s or purchase a new one if necessary.
- Switch to another power outlet. The outlet you are using might not be functioning correctly, reducing the charging efficiency. Plug the charger into a different outlet, preferably one directly on the wall.
- Test the USB port on your computer or adapter with another device to ensure it’s working correctly.
By trying alternative chargers or outlets, you can determine if the issue lies with your camera or the power source.
By following these troubleshooting steps, you should be able to resolve most charging issues with your Flip Video camera. Remember to be patient, and if the problem persists, seek assistance from a professional technician.
How to Charge a Flip Video Camera?
A Short Guide to Charging Your Flip Video Camera
Hold onto those spontaneous memories! Here’s how to get your Flip camera back in action with a quick charge:
Step 1: Locate the hidden arm. Slide the latch on the side of your Flip down. This magical contraption hides a built-in USB arm just waiting to be unleashed.
Step 2: Connect to your computer. Flip that arm up and proudly plug it into any USB port on your trusty PC or Mac.
Step 3: Let the juice flow. Your Flip should automatically recognize its power source and start gulping down electricity. You might even see a nifty charging indicator on the screen.
Tips: While your Flip recharges, explore the pre-loaded Flip Share software on your computer. It’s your gateway to editing and sharing those epic Flip moments.
Charging Times:
- Be patient, grasshopper. A full charge can take up to 4 hours.
- For a speedier option (around 2 hours), consider purchasing a Flip Video Power Adapter (if available).
Tips For Extending Battery Life
Minimize Usage of Battery-Intensive Features
Minimize Usage Of Battery-intensive Features
When you want to conserve battery life, minimizing the usage of battery-intensive features is crucial. This includes avoiding continuous use of the zoom function and video playback, which can drain the battery more quickly.
7.2. Reduce Screen Brightness
Reduce Screen Brightness
Reducing the screen brightness can significantly extend the battery life of your Flip video camera. Lowering the brightness not only conserves power but also reduces eyestrain during prolonged use.
Bonus: Charging On The Go
When you’re on the move, it can be frustrating to find yourself with a Flip Video camera that’s running out of battery. That’s why we’ve included this bonus section on how to charge your camera while you’re on the go. With these tips, you’ll never have to worry about missing out on capturing those special moments again.
Use A Portable Power Bank
If you’re going on a long trip or simply need to charge your Flip Video camera while away from a power outlet, a portable power bank is a great solution. These handy devices are designed to provide portable power for your electronic devices, including your camera. Compatible with most Flip Video camera models, a power bank can give you an additional boost of battery life, extending your recording time.
Here are a few key advantages of using a portable power bank:
- Compact and lightweight, making it easy to carry in your bag or pocket.
- Provides multiple charging cycles, allowing you to charge your camera multiple times on a single charge.
- Equipped with multiple USB ports, enabling you to charge multiple devices simultaneously.
Invest In A Car Charger
Another convenient way to charge your Flip Video camera on the go is by investing in a car charger.
This accessory allows you to charge your camera using the power from your vehicle’s cigarette lighter socket. It’s an excellent option for individuals who frequently travel by car and want to ensure their camera is always ready to capture those spontaneous moments.
Here are a few reasons why a car charger is worth considering:
- Compatible with most Flip Video camera models, making it a versatile charging option.
- Convenient and easy to use while on the road.
- Prevents your camera from running out of battery, ensuring you don’t miss any important shots.
By using a portable power bank or investing in a car charger, you can charge your Flip Video camera while on the go, allowing you to keep recording those precious moments. These accessories offer practical and reliable solutions, ensuring that your camera is always charged and ready whenever you need it.
Frequently Asked Questions Of How To Charge A Flip Video Camera
How Do I Know If My Flip Video Is Charging?
To check if your Flip Video is charging, connect it to a power source using the USB cable. Look for a battery icon or indicator on the screen, which shows the charging progress. If the battery is filling up or the indicator is moving, it’s charging.
How Do You Change The Battery In A Flip Video Camera?
To change the battery in a Flip Video camera, open the battery compartment and remove the old battery. Insert the new battery life in the same orientation and close the compartment securely. Make sure the new battery is fully charged before use.
How Do I Charge My Mino HD Flip Video?
To charge your Mino HD Flip Video, connect it to a power source using the USB cable provided. Make sure the device is turned off while charging. The LED light will indicate when it’s fully charged.
Why Is My Flip Video Camera Not Turning On?
Your Flip Video camera may not be turning on due to a dead battery or a faulty power button. Try charging the battery or replacing it if necessary. If the power button is the issue, consider getting it repaired or contacting customer support for further assistance.
How Long Does It Take To Charge A Flip Video Camera?
Charging a Flip video camera takes around 2 to 3 hours to fully charge.
Can I Charge My Flip Video Camera Using A Computer?
Yes, you can charge your Flip video camera by connecting it to a computer using the USB cable provided.
Conclusion
In short, charging a flip video camera is a simple process that can be done using the charger provided with the camera. Keeping your camera fully charged ensures you don’t miss any recording opportunities. Following these steps will help keep your flip video camera ready to capture all your memorable moments effortlessly.