If you have an Acer V246Hl monitor, you may need to remove the stand to install it on a different mount or stand. You’ll get here on How to Remove Acer V246Hl Monitor Stand? The process is relatively simple and only requires a few steps. First, locate the four screws on the back of the monitor near the bottom.
These screws will be held on the stand. Next, unscrew these four screws and set them aside. Once the screws are removed, you should be able to pull the stand away from the monitor.
If there is any resistance, make sure that all four screws have been removed before continuing. With the stand now detached, you can proceed with installing your monitor on a new mount or stand.
- Locate the screws on the back of the Acer V246Hl monitor
- Unscrew the screws using a Phillips head screwdriver
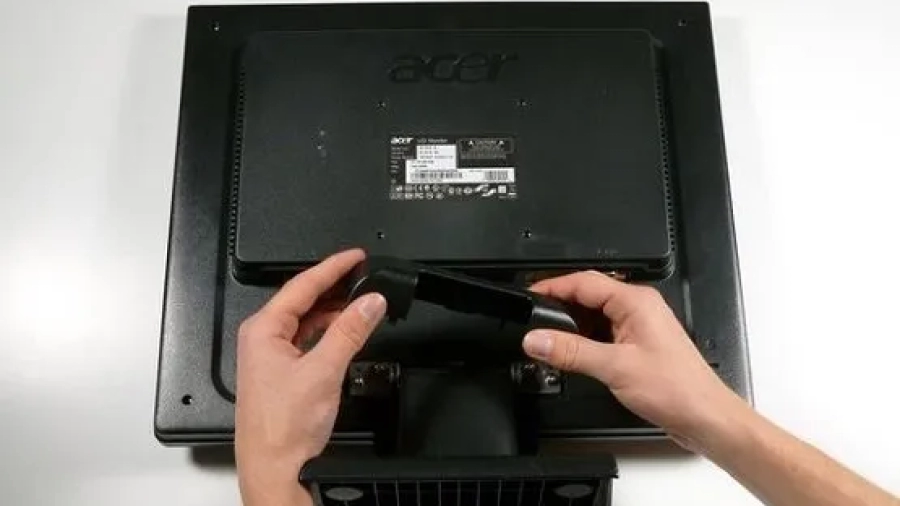
- Carefully remove the stand from the monitor
- Dispose of or recycle the stand according to your local regulations
How to Remove Acer V246Hl Monitor Stand in Video
How Do I Remove the Base from My Acer Monitor?
If you have an Acer monitor, you may be wondering how to remove the base. This can be done by following a few simple steps. First, locate the four screws that hold the base to the monitor.
These are usually located on the back of the monitor, near the corners. Unscrew these screws and set them aside. Next, gently lift the base off of the monitor.
If it is stuck, you may need to wiggle it a bit to get it loose. Once the base is removed, you will see four plastic pegs sticking up from the monitor. These pegs fit into corresponding holes in the base.
To remove them, simply push down on each peg until it pops out of its hole. You may need to use a small flathead screwdriver to help with this step. With the pegs removed, your Acer monitor is now free from its base!
How Do I Remove Monitor Stand from Monitor?
If you need to remove your monitor stand for any reason, it’s a pretty easy process. First, unplug your monitor from its power source. Next, find the screws that hold the stand to the back of the monitor.
These are usually located near the bottom of the stand. Unscrew these and set them aside. With the screws removed, you should be able to simply pull the stand away from the back of the monitor.
If it’s stuck, try wiggling it a bit until it comes free. Once you have the stand off, you can put it back on by reversing these steps.
How Do I Remove the Stand from My Acer Ek240Y Monitor?
If you need to remove the stand from your Acer ek240y monitor, there are a few simple steps you can follow. First, make sure that the monitor is unplugged and turned off. Next, locate the four screws on the back of the stand near the base.
These screws will need to be removed in order to release the stand. Once the screws have been removed, you should be able to gently pull the stand away from the monitor. If you have any trouble removing the stand, consult your Acer ek240y manual for further instructions.
How Do You Remove the Acer Predator Monitor Stand?
If you need to remove the stand from your Acer Predator monitor, there are just a few steps you need to follow. First, locate the four screws on the back of the monitor that hold the stand in place. Next, unscrew these screws and carefully remove the stand from the monitor.
Finally, reattach the stand by screwing it back into place. That’s all there is to it.
If you want to purchase a Monitor then you may check the Best Triple Monitors for Sim Racing, and the Best Pants to Hide Ankle Monitor.
How to Remove Acer Lcd Monitor Stand
If you have an Acer LCD monitor, you may want to remove the stand in order to save space or for another reason. Here are the steps to do so:
1. Unplug your monitor from any power source and then turn it over so that the back is facing up.
2. Find the four screws at the corners of the stand. Two will be located near the bottom of the stand, and two will be located near the middle.
3. Unscrew these four screws using a Phillips head screwdriver.
Once they are removed, set them aside in a safe place.
4. Turn your monitor right-side up and then gently pull on the stand until it comes off completely. If it seems stuck, make sure that all four screws have been removed before trying again.
5. Your Acer LCD monitor should now be free from its stand! You can either discard of the stand or keep it in case you ever need to put it back on (for example, if you sell your monitor).
How to Remove Acer Ek220Q Monitor Stand
If you have an Acer Ek220Q monitor, you may be wondering how to remove the stand. The stand can be removed by following these simple steps:
1. First, unplug the power cord from the back of the monitor.
2. Next, locate the two screws that attach the stand to the monitor. These screws are located on the underside of the monitor, near the base.
3. Using a Phillips head screwdriver, remove both screws and set them aside in a safe place.
4. Now gently lift up on the stand until it comes free from the monitor. Be careful not to damage any of the connections when doing this.
There are other Monitor related resources that you may check Can You Get on a Plane With an Ankle Monitor?
Can a 144Hz Monitor Run 240 FPS?
A Cellular Phone Company Monitor Monthly Phone Usage?
What Monitor Should I Get for RTX 2060?
Acer Monitor Disassembly
If you’re looking to disassemble your Acer monitor, there are a few things you need to know. First, identify which model of Acer monitor you have. There are several different models, each with their own unique set of screws and connectors.
Once you’ve identified your model, consult the user manual or online documentation for instructions on how to disassemble it.
Before beginning any work, be sure to unplug the power cord from the monitor and discharge any static electricity from your body by touching a metal object. This will help prevent damaging the delicate electronic components inside the monitor.
Once you have all the necessary information and precautions out of the way, begin by removing the stand or base from the monitor. If your model has screw-on feet, these will need to be unscrewed before moving on. With the base removed, locate and remove all screws holding the back cover in place.
Gently lift off the back cover, taking care not to damage any fragile internals.
Now that you have access to the internals of your Acer monitor, you can begin troubleshooting or repairing any issues as needed. Be sure to reassemble your monitor carefully following the same steps in reverse order when finished.
Last Word
If you need to remove your Acer V246Hl monitor stand, there are a few simple steps you can follow. First, locate the four screws on the back of the monitor. Two of these screws will be located near the top of the stand, while the other two will be located near the bottom.
Once you have found all four screws, use a Phillips head screwdriver to remove them. Next, gently pull the stand away from the monitor. There may be some resistance at first, but it should come free.
If you find that the stand is still attached to the monitor in any way, simply refer to your user manual for further instructions. With the stand removed, you should now have full access to all of your Acer V246Hl’s ports and inputs!