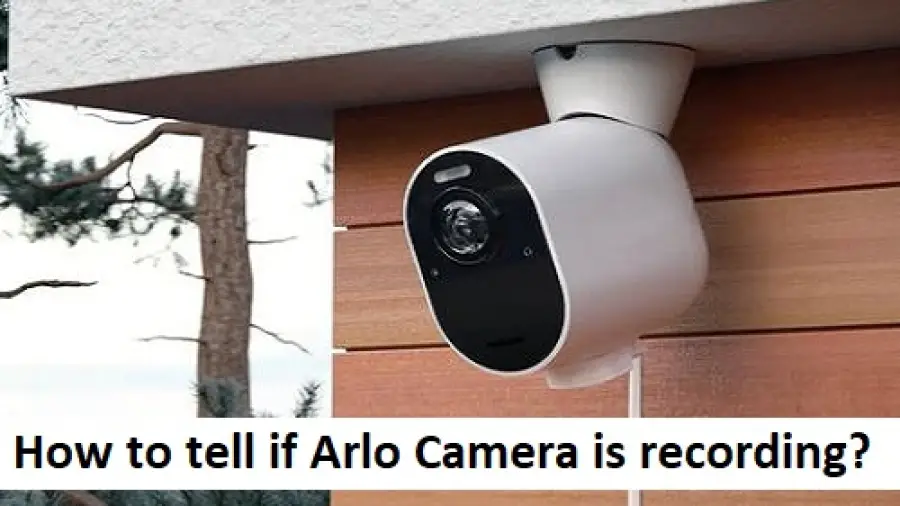
How to Tell If Arlo Camera is Recording? To determine if an Arlo camera is recording, check if the LED light on the camera is blinking. If it is, this indicates that the camera is recording and capturing video footage.
When setting up or troubleshooting your Arlo camera, it is essential to know whether it is actively recording or not. Identifying whether the camera is recording can be done by observing the LED light on the camera. If the LED light is blinking, it means the camera is actively recording and capturing video.
This simple feature allows you to immediately know if your Arlo camera is functioning as intended. By being aware of the recording status, you can ensure the safety and monitoring capability of your Arlo camera system.
Lights And Indicators
When using Arlo cameras, it’s essential to know if the camera is actively recording. Understanding the various lights and indicators can provide important insights. By paying attention to the lights and indicators on your Arlo camera, you can easily determine whether it is recording or not. In this section, we’ll delve into the different lights and indicators to help you understand how to tell if your Arlo camera is recording.
Power Led
The Power LED on the Arlo camera indicates the current status of power. When the camera is recording, the Power LED will typically remain solid or blink in a specific pattern, depending on the model. A solid green Power LED generally indicates that the camera is powered on and functioning normally, while a blinking Power LED may signal a low battery or other issues requiring attention.
Internet Led
The Internet LED on an Arlo camera signifies the connection status to the internet. When the camera is recording, the Internet LED should display a solid or blinking green light, indicating a stable internet connection. If the light is red or not illuminated, it may indicate a connectivity issue, potentially affecting the camera’s ability to record and transmit footage.
Camera Led
The Camera LED provides visual feedback on the camera’s operational status. When the camera starts recording, the LED will typically flash or remain solid to indicate activity. Understanding the typical LED behavior during recording can help you determine whether the camera is actively capturing footage.
Live Feed And Recording
One of the key features of Arlo cameras is their ability to provide real-time monitoring of your surroundings through a live feed. Additionally, these cameras also allow you to review recorded footage, giving you peace of mind that you can always stay up-to-date with what’s happening in and around your property. In this article, we will discuss how you can check the live feed and review recorded footage on your Arlo camera.
Checking The Live Feed
Checking the live feed from your Arlo camera is a simple process that can be done via the Arlo app or web portal. Follow these steps:
- Open the Arlo app on your smartphone or access the Arlo web portal on your computer.
- Select the camera you want to view from the list of available cameras.
- Wait for a few seconds, and you will see the live feed from your camera appear on your screen.
- To control the live feed, you can use the options provided by Arlo, such as zooming in on a particular area or switching between different cameras if you have multiple Arlo devices.
By checking the live feed, you can instantly see what is happening in your camera’s field of view and address any concerns or issues that may arise.
Reviewing Recorded Footage
Arlo cameras also offer the capability to review previously recorded footage, allowing you to go back and analyze events of interest. Follow these steps to review recorded footage:
- Launch the Arlo app on your smartphone or access the Arlo web portal on your computer.
- Select the camera that you want to review the footage from.
- Navigate to the ‘Library’ section in the app or web portal.
- You will see a timeline with different events marked as thumbnails.
- Click or tap on the desired event thumbnail to view the recorded footage.
- While reviewing, you have the option to pause, rewind, or fast-forward the playback as needed.
Reviewing recorded footage provides you with a valuable resource to investigate suspicious activities, monitor the behavior of individuals, or gather evidence if needed.
Activity Zones
One powerful feature of Arlo cameras is the ability to set up activity zones. Activity zones let you specify certain areas within the camera’s field of view where you want to monitor activities more closely. With activity zones, you can focus on important areas such as your front door, driveway, or backyard, while minimizing notifications for less significant areas. In this blog post, we will guide you through the process of setting up and monitoring activity zones for your Arlo camera.
Setting Up Activity Zones
To set up activity zones on your Arlo camera, follow these simple steps:
- Open the Arlo app on your smartphone or tablet.
- Select the camera you want to set up activity zones for.
- Navigate to the camera settings.
- Look for the “Activity Zones” option and tap on it.
- You will be presented with a live view of your camera’s feed.
At this point, you can see the entire field of view captured by your camera. To create an activity zone:
- Tap and drag on the viewing area to adjust the size and shape of the zone.
- Use pinch-to-zoom gestures to zoom in or out to fine-tune the zone boundaries if needed.
- Once you’re satisfied with the activity zone, tap on the save or done button.
Your Arlo camera will now start monitoring the specified activity zone, while ignoring movements outside the designated area. This feature reduces false notifications and improves overall efficiency.
Monitoring Activity Zone Recordings
Now that your activity zones are set up, it’s important to know how to monitor the recordings captured within those zones. Follow these steps to review activity zone recordings:
- Launch the Arlo app on your smartphone or tablet.
- Select the camera with the activity zones you want to review.
- Navigate to the camera settings.
- Locate the “Library” or “Recordings” option and tap on it.
- You will see a list of recorded videos from your camera.
- Look for the filters or search options within the app to narrow down the results specifically to the activity zones.
- Review the recordings within your activity zones based on the date and time stamps provided.
By following these steps, you can easily identify if your Arlo camera has recorded any activities within the designated activity zones. This helps you stay informed about important events happening in the areas you care about the most.
How to Tell If Arlo Camera is Recording? Full Guides
Here’s a concise guide on how to determine if your Arlo camera is recording:
-
Check the LED Light
- Look at the camera’s LED light. If it’s green, it’s recording; if there’s no light, it’s not recording.
- Note that bright ambient light might make it hard to see the LED color.
-
Base Station Button
- Press the button on your Arlo base station:
- Green light: Cameras are synced and working.
- Red light and random alarm: Camera issues detected.
- Press the button on your Arlo base station:
-
Arlo App
- Open the Arlo Secure app:
- Check the recording status for your camera.
- Look for a red dot or the word “Recording.”
- Open the Arlo Secure app:
Remember, monitoring your Arlo camera ensures security coverage
Motion And Sound Detection
`Motion and sound detection are crucial features of Arlo cameras, allowing you to monitor your property for any unusual activity. By enabling these functionalities, you can receive alerts when the camera detects movement or sound, providing you with an added layer of security and peace of mind.`
Adjusting Motion Detection Sensitivity
`To ensure that your Arlo camera is effectively capturing motion, you can adjust the motion detection sensitivity settings. This allows you to customize the level of movement required to trigger a recording, reducing false alarms from insignificant motion and ensuring you receive notifications for meaningful activity.`
Customizing Sound Detection
`Customizing sound detection settings on your Arlo camera enables you to specify the type and volume of noises that will trigger a recording. This ensures that you are only alerted to significant sounds and have the ability to differentiate between regular household noise and potential security threats.`
Notification Settings
One of the key features of Arlo cameras is their ability to send you notifications whenever motion or sound is detected. These notifications ensure that you stay updated with any activity happening in and around your property. In this section, we will delve into the different aspects of Arlo’s notification settings, including how to enable notifications and configure your notification preferences.
Enabling Notifications
To start receiving notifications from your Arlo camera, you need to enable the notification feature. Follow these simple steps to ensure that you stay informed:
- Login to your Arlo account on the Arlo mobile app or web portal.
- Select the camera you want to enable notifications for.
- Navigate to the camera settings.
- Locate the “Notifications” tab and click on it.
- Toggle the notification settings to “On” or “Enabled” to activate the feature.
By completing these steps, you have successfully enabled notifications for your Arlo camera. Now, let’s move on to configuring the notification preferences to suit your specific requirements.
Configuring Notification Preferences
Arlo provides you with the flexibility to customize your notification preferences based on your preferences. Whether you want to receive notifications for all motion and sound alerts or only for specific events, the following steps will guide you:
- Access the camera settings for the camera where you want to configure the notification preferences.
- Select the “Notifications” tab.
- Scroll down to the “Notification Preferences” section.
- Choose from the available options to specify the type of notifications you want to receive. You can decide whether you want to receive notifications for all motion/sound events, people, animals, or vehicles.
- You can further fine-tune your preferences by selecting the desired sensitivity level for motion and sound detection.
- Click on the “Save” or “Apply” button to save your notification preferences.
By following these steps, you have successfully configured your Arlo camera’s notification preferences to receive alerts that are most important to you. Now, you can stay on top of any activity detected by your camera without any hassle.
Cloud Storage And Subscription
We will explore the significance of cloud storage and subscription for your Arlo camera. These features play a crucial role in ensuring that your camera is recording and storing video footage seamlessly. Understanding Arlo Smart, Managing Cloud Storage, and the Subscription process are essential aspects that empower you to get the most out of your Arlo camera.
Understanding Arlo Smart
Arlo Smart is a feature-packed subscription service offered by Arlo that enhances your Arlo camera’s capabilities. It provides a host of benefits like advanced AI-powered detection, personalized notifications, and cloud storage for your camera’s recordings.
With Arlo Smart, you can enjoy the perks of activity zones, which enable you to define specific areas within your camera’s field of view for focused motion detection. This ensures that you receive alerts only when motion is detected in those specific zones, reducing unnecessary notifications.
Furthermore, Arlo Smart utilizes advanced algorithms to recognize people, vehicles, animals, and packages. This intelligent detection enables you to filter out irrelevant motion alerts and receive notifications that truly matter to you.
Managing Cloud Storage
Effective management of cloud storage is crucial for ensuring that your Arlo camera continues to record seamlessly. When your camera is set to record, the footage is securely stored in the cloud storage provided by Arlo. This keeps your videos safe even if the camera is damaged or stolen.
Arlo offers various subscription plans that determine the amount of cloud storage space available to you. These plans range from free services with limited storage to premium plans with ample storage space for extended periods.
It is important to keep track of your storage capacity to ensure uninterrupted recording. Arlo’s user-friendly interface allows you to monitor your remaining storage space easily. By doing this, you can avoid missing out on important footage due to storage constraints.
When your storage space approaches its limit, Arlo offers flexibility in managing your recordings. You can choose to delete older footage manually or set up automated rules to overwrite old recordings with newer ones.
Remember, proper management of cloud storage plays a vital role in ensuring continuous recording and protecting your valuable moments.
By now, you have a solid understanding of the importance of cloud storage and subscription for your Arlo camera. The Arlo Smart feature elevates your camera’s capabilities with AI-powered detection and personalized notifications. Managing your cloud storage efficiently guarantees seamless recording and effortless access to your video footage. Utilize these aspects to harness the full potential of your Arlo camera and enjoy the peace of mind that comes with a smart monitoring system.
Camera Modes
Arlo cameras come with different modes to suit various recording needs. Understanding these modes allows you to customize the camera settings to match your specific preferences and requirements.
Arming And Disarming Cameras
One of the primary modes of Arlo cameras is the ability to arm or disarm them. Arming a camera activates it, allowing it to detect motion and record, while disarming disables the camera’s recording capabilities. This is particularly useful when you want to turn off recording during specific times or when you are present at the monitored location.
Customizing Modes
Arlo cameras offer additional customization through various modes such as armed, schedule, and geofencing. The armed mode enables continuous camera recording based on specific rules or scheduling, while the geofencing mode uses the location of your mobile device to automatically adjust the camera’s behavior when you enter or leave a designated area. With the ability to personalize the camera’s modes, Arlo provides a tailored and flexible monitoring experience.
Battery And Power
Wondering if your Arlo Camera is recording? Check the battery and power indicators: a solid green light means it’s recording, while red means low battery. You can also view the live feed on the Arlo app to confirm if the camera is actively recording.
Checking Battery Status
Regularly checking the battery status of your Arlo Camera is essential to ensure uninterrupted surveillance. You wouldn’t want your camera to shut down right when you need it the most, would you?
To check the battery status on your Arlo Camera, simply follow these quick and easy steps:
- Launch the Arlo app on your mobile device or log in to the Arlo web portal.
- Select the camera you want to check the battery status for.
- Navigate to the camera settings or device settings section, depending on your platform.
- Look for the battery icon or battery status indicator. This will display the current battery level of your Arlo Camera.
By regularly monitoring the battery status, you can spot when it’s time to recharge your camera or replace the batteries. Remember, a camera with a low battery level may not be recording effectively, which can compromise the safety of your property.
Optimizing Camera Power
Maximizing the power efficiency of your Arlo Camera not only extends battery life but also ensures continuous recording. To keep your camera powered up and operating efficiently, consider the following tips:
- Adjust the camera’s field of view: Narrow down the camera’s field of view to focus on the most important areas, reducing unnecessary motion detection triggers and conserving battery power.
- Manage motion detection sensitivity: Fine-tuning the motion detection sensitivity to avoid excessive triggers from minor movements can prevent unnecessary battery drain.
- Schedule power-saving modes: Take advantage of the Arlo Camera’s power-saving modes, such as scheduling specific times for the camera to enter sleep mode or turn off certain advanced features when they are not required.
- Enable motion-activated recording: Instead of continuous recording, activate the motion-activated recording feature to capture crucial footage only when motion is detected, saving substantial power.
- Utilize Arlo Camera accessories: Some Arlo Camera models offer optional accessories such as solar panels or outdoor charging cables that can keep your camera powered up without worrying about battery levels.
By implementing these power optimization techniques, you can ensure a long-lasting battery life for your Arlo Camera, reducing the need for constant monitoring and maintenance.
Troubleshooting
When it comes to monitoring your home or office, Arlo cameras are a popular choice. But what if you’re not sure if your Arlo camera is recording? Don’t worry, we’ve got you covered! In this troubleshooting guide, we will address common issues you may encounter and guide you on how to ensure your Arlo camera is recording.
Common Issues
Before jumping into troubleshooting, it’s important to understand the common issues that may cause your Arlo camera not to record. Here are some of the problems you might encounter:
- Camera Offline: If your Arlo camera shows as offline, it won’t be able to record. This could be due to a weak WiFi signal or power issues. Make sure your camera is connected to a stable WiFi network and check if there are any battery or power supply problems.
- Inadequate Motion Detection Settings: If your Arlo camera’s motion detection settings are not properly configured, it may not record as expected. Check your camera’s settings and ensure that motion detection is enabled and set at an appropriate sensitivity level.
- Insufficient Storage Space: Arlo cameras rely on cloud storage to save recorded footage. If your cloud storage is full, the camera won’t be able to record. Consider deleting old recordings or upgrading your storage plan to accommodate more footage.
- Software or Firmware Issues: Occasionally, software or firmware updates can cause glitches that affect your camera’s recording functionality. Make sure your Arlo camera is running the latest software version and consider updating if necessary.
- Camera Placement: Incorrect camera placement can result in missed recordings. Ensure your camera is positioned at the right angle and in a location where it can effectively capture the desired area.
Contacting Support
If you’ve gone through the common issues without success or need further assistance, reaching out to Arlo’s support team is your next step. Follow these steps to contact Arlo support:
- Visit Arlo’s official website and navigate to the support section.
- Look for the contact information and choose the appropriate support channel such as live chat, phone support, or email support.
- Provide relevant details about your issue, including the model of your Arlo camera, the troubleshooting steps you’ve already taken, and any error messages you’ve encountered.
- Wait for a response from the support team and follow their instructions to resolve the problem.
Remember, contacting support should be your last resort after exhausting all possible troubleshooting options.
In conclusion, troubleshooting your Arlo camera’s recording issues can be done by addressing common issues and, if needed, reaching out to Arlo’s support team. By following the steps provided in this guide, you’ll be able to verify if your Arlo camera is recording and resolve any issues that may arise along the way.
Read also more related topics: Why Won’t My Canon Camera Turn on?
Why My iPhone Camera is Blinking?
How to Load Film into a Camera?
How Long Is Traffic Camera Footage Stored?
Frequently Asked Questions On How To Tell If Arlo Camera Is Recording
Do Arlo Cameras Have A Light On When Recording?
Yes, Arlo cameras have a light that turns on when they are recording.
How Can You Tell If Someone Is Watching Live On Arlo Camera?
To determine if someone is watching live on your Arlo camera, check the active user list on the Arlo app or website. This will display the number of current viewers.
How Do You Know When Arlo Cameras Are On?
You can tell Arlo cameras are on when the LED light turns solid blue. You can check the Arlo app for camera activity status.
Are Arlo Cameras Always Recording?
No, Arlo cameras are not always recording. They have motion detection that starts recording when it detects movement. This helps to save storage space and battery life.
How Can I Check If My Arlo Camera Is Recording?
To determine if your Arlo camera is recording, you can look for a red blinking LED light on the camera itself or check the activity section in your Arlo app.
What Are The Indications Of An Arlo Camera Recording?
An Arlo camera that is recording will show a live video feed on your Arlo app, capture audio if enabled, and store the footage in your cloud storage for later viewing.
Conclusion
Knowing if your Arlo camera is recording is crucial for security. By understanding the status lights and app notifications, you can ensure that your camera is working as intended. Keeping an eye on the battery and connection status will also help maintain smooth functioning.
Stay updated and keep your Arlo camera running smoothly for added peace of mind.